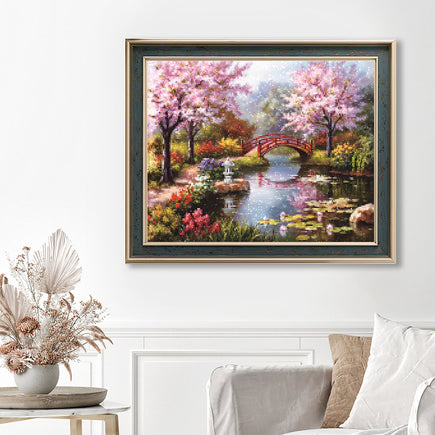
What is Diamond Art Painting?

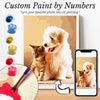
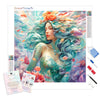
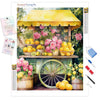
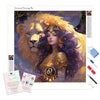
Diamond art painting is a fun and creative hobby that combines the charm of cross-stitch with the sparkle of rhinestones. Imagine turning a beautiful image into a sparkling masterpiece—one tiny gem at a time! With Diamond Painting Pro, this mesmerizing activity is easily accessible for everyone, from experienced crafters to complete beginners.
What Is Diamond Painting?
Diamond painting is like paint-by-numbers but with glittering resin diamonds instead of paint. You place these gorgeous rhinestones onto a self-adhesive canvas, which is printed with a color coded design. Each tiny diamond, also known as a "drill", adds a bit of sparkle and the result is a beautiful mosaic that shines from every angle.
The best part? No artistic skill required! All you need is patience, a steady hand and a desire to watch your masterpiece come to life, one sparkly bead at a time. It's a great way to unwind and add some sparkle to your day.
What Is the Point of Diamond Art?
You might be wondering, what's the point of diamond art? Beyond the beautiful artwork you get to create, diamond painting offers a lot of other benefits. It's a creative outlet, so you can express yourself in a fun and unique way. Placing each diamond is meditative and relaxing, so it's a great way to de-stress and clear your mind.
Diamond art also gives you a sense of achievement. Watching your artwork come to life, one sparkly bead at a time, is so satisfying and completing a project will boost your mood and confidence. It's a hobby that doesn't require special skills—just a willingness to have fun and be creative.
Moreover, diamond paintings make great gifts or decor. Imagine gifting someone a piece of art you made just for them or hanging your masterpiece in your living room where it can catch the light and brighten up the room. The joy in the making and the final product are the true points of diamond art.
What Types of Diamond Drills Are There?
When it comes to paint with diamonds, there are several types of drills that you can use to make your artwork dazzle and shine. Let's dive into the different options available:
Round Drills
Round drills are circular diamonds that are easy to pick up and place, making them perfect for beginners. Because they don't have sharp edges, round drills fit comfortably on the canvas without needing perfect alignment, allowing for a quicker and more forgiving painting process. One thing to note is that round drills leave small gaps between the diamonds, giving the finished piece a softer, almost "bubbly" effect. Diamond Painting Pro round drills are crafted with extra facets for enhanced sparkle, so your artwork will shine beautifully.
Square Drills
Square drills are tiny, square-shaped gems that fit snugly together on the canvas, leaving no gaps. This creates a complete mosaic look that many diamond painters love. While they require a bit more precision to place, the reward is a finished piece with a polished and seamless appearance. The tight fit and satisfying "snap" as they click into place make square drills a favorite for those who enjoy a meticulous and detailed process. Diamond Painting Pro's square drills are designed for excellent color consistency and a flawless fit, giving you that perfect, finished look.
Aurora Borealis (AB) Drills
AB drills are extra-special diamonds with an iridescent coating that gives them an even more radiant sparkle. Named after the Aurora Borealis (Northern Lights), these drills reflect a rainbow of colors when they catch the light, adding an enchanting, magical touch to your artwork. AB drills are often used as accents to highlight specific areas of a painting, such as stars, sparkling water, or anything that needs an extra touch of magic. Including AB drills in your project can take your diamond painting to the next level, giving it a truly mesmerizing glow.

What's Included in a Diamond Painting Pro Kit?
Diamond Painting Pro kits come with everything you need to create a stunning diamond painting. Here's what's inside:
- Premium-Quality Canvas: Our canvases are made from high-quality materials with poured glue and HD symbols, ensuring durability and a smooth painting experience. They're printed with vibrant colors, making it easy to see where each diamond goes.
- Color Coded Diamond Drills: All of our diamonds are conveniently sorted into labeled bags. Each color is carefully matched to ensure your painting shines brightly.
- Applicator Tool, Tray, and Wax: You'll receive a magic diamond applicator with grip(1, 4 and 9 placer heads), a XL tray to hold your diamonds, two wax pads to help pick up each gem,and tweezers used for precised diamond application. We even include zip lock bags for storing your leftover diamonds.
Our kits make it easy for anyone to start diamond painting, whether you're crafting alone or with friends and family.

How to Get Started a Diamond Painting Kit?
Ready to dive into the world of diamond art? Getting started is simple with a Diamond Painting Pro kit. Everything you need comes in the kit, including the canvas, diamond drills, tools, and easy-to-follow instructions. Here's a quick guide to get you started:
- Lay all materials on a flat surface, organized and within easy reach. Select a section of the painting to work on first.
- Review the coded chart on the canvas to identify the colors in that section. Choose one color to begin and locate the corresponding packet of diamonds.
- Pour the packet of diamonds in the XL diamond sorting tray provided.
- Gently shake the tray back and forth so the diamonds settle with the flat side down. The faceted side must be facing up when you use the applicator to pick each diamond up.
- Slowly remove the plastic film from the canvas as you work section by section, to protect the design from dust and keep the adhesive from wearing off.
- Apply diamonds starting at the bottom corner of the design, carefully working your way up the canvas.
- After each session, cover the wax on the applicator tool with cellophane and replace the plastic film over the area on which you were working.
- Once the painting is complete, use a rolling pin or book to carefully and gently press over the canvas, securing the diamonds firmly into place.
It's that easy! Simply repeat these steps until your canvas is covered in beautiful, sparkling diamonds. Before you know it, you'll have a dazzling piece of art that's ready to display.

What to Do with a Finished Diamond Painting?
Once you've completed your diamond painting, it's time to display your sparkling masterpiece! Framing is the perfect way to protect and show off your artwork, turning it into a beautiful addition to your home decor. Here are a few ways to frame your finished piece:
- Traditional Frames: Traditional frames are a classic way to give your diamond art that polished, professional vibe while keeping it looking fab! You can choose from all kinds of styles—wood frame, metal frame, or vintage frame to match your decor perfectly.
- Magnetic Hangers: If you're after a simple and stylish way to show off your diamond painting, magnetic hanger frames are your new best friend!
- Frameless Mounting: For a clean and stylish vibe, frameless mounting is an awesome alternative! It lets your finished diamond art shine all on its own—no traditional frame needed to steal the spotlight.
- DIY Alternatives: If you're a DIY fan, this is your time to shine! You can craft your own fabulous frames from all sorts of repurposed goodies, or give new life to old ones with a little bit of creativity.
No matter which method you choose, framing your diamond art will not only protect it but also enhance its beauty, making it a true centerpiece in your home.

DIY Diamond Art Painting Tips
Want to make the most of your diamond dot painting journey? Here are some additional DIY tips to keep your creativity flowing and your project organized:
1. Sectioning with Washi Tape
Divide your canvas into smaller sections using washi tape to create manageable work areas. This approach helps keep you focused and gives you a sense of accomplishment as you complete each section. Plus, it makes the process less daunting!
2. Make It a Group Activity
Diamond painting doesn't have to be a solo activity! Invite friends or family members to join you for a diamond painting session. It's a wonderful way to spend quality time together, share stories, and have fun—all while creating art.
3. Keep Your Wax Fresh
Your applicator wax is key to picking up those tiny diamonds effectively. If the wax starts to lose its stickiness, refresh it by pressing your tool back into the wax pot. Always keep an extra pot of wax handy, so you’re never caught without it mid-session.
4. Label Everything
Labeling isn't just for diamonds! Label your tools, storage bags, and even sections of your canvas to stay organized. This will save you time and help keep everything in order, especially for larger projects that have lots of different colors and symbols.
5. Try Different Background Music
Experiment with background music, podcasts, or audiobooks to make your crafting time even more enjoyable. Upbeat music can make the process more lively, while a calming playlist can add to the relaxation that diamond painting brings.
6. Store Finished Projects Safely
If you're not ready to frame your finished diamond painting right away, store it safely by placing it flat in a drawer or art portfolio. Cover it with parchment paper to protect the diamonds from dust and other elements.
Final Thoughts
Diamond painting is more than just a craft—it's a journey of creativity, relaxation, and personal fulfillment. Whether you're a beginner or a seasoned painter, each tiny gem you place brings you closer to a beautiful masterpiece and a sense of achievement. From reducing stress to creating unique home decor, diamond painting offers countless benefits that make it a rewarding hobby. So grab your Diamond Painting Pro kit, let your creativity sparkle, and enjoy the magical process of bringing art to life, one diamond at a time!


