
How to Turn a Family Photo into a Diamond Painting
Few crafting experiences match the magic of watching a cherished family snapshot transform, piece by sparkling piece, into a glowing work of mosaic art. Standard diamond painting kits offer beautiful landscapes and floral designs, but creating a family photo diamond painting brings a deeply emotional connection to your workspace.
Whether you want to capture a wedding day, commemorate a family reunion, or create a thoughtful personalized family gift, converting your photos into diamond art blends therapeutic crafting with lasting sentimental value. Here is everything you need to know to achieve brilliant, photo-realistic results.

1. What Is a Custom Family Photo Diamond Painting?
A custom diamond painting takes a personal photograph and translates it into a color-coded canvas map. Tiny, faceted resin beads—known as drills—are applied one by one onto a sticky background grid using a specialized wax tool.
When you order a custom family portrait diamond painting from Diamond Painting Pro, our master design team uses advanced color-mapping software to process your digital image, converting each pixel into a code that corresponds to a specific drill shade. Printed on our signature premium, poured-glue canvas, the result is a sparkling, tactile masterpiece that captures your favorite moments in vivid color.
2. Choose the Perfect Family Photo for Diamond Painting
The single most important factor determining the quality of your finished project happens before you place an order: picking the right source image. What Makes a Good Photo?
- High Resolution and Sharp Focus: Blurry or pixelated photos translate poorly into diamond art grid software.
- Balanced Lighting: Look for photos with natural, even lighting across everyone's faces. Deep shadows or harsh glares create flat, muddy blocks of color.
- Close-Up Framing: Choose close-up portraits where faces occupy most of the frame. Small faces in wide-angle group shots lose their features when mapped into tiny resin drills.
- Vibrant Color Variation: Distinct color contrasts between hair, skin, clothing, and backgrounds help define features clearly across the canvas grid.
3. Prepare Your Photo Before Uploading
A few simple photo adjustments make a dramatic difference in your final canvas rendering:
- Crop Out Clutter: Remove excessive background space, trees, or empty rooms. Focus tightly on family members to maximize the canvas area dedicated to facial details.
- Adjust Brightness and Contrast: Use basic photo editing software or mobile phone controls to boost mid-tones slightly and smooth out harsh shadows.
- Consider Color Tones: If your source photo has an unnatural color cast (such as heavy orange indoor lighting), correct the color tint first so your drills match natural skin tones.

4. Select the Right Diamond Painting Size
Smaller canvases contain fewer "pixels," which means fine details in the image may be lost; therefore, choosing the right size is important for your family photo diamond painting.
- 1–2 People: A minimum canvas size of 40x50 cm (15.8”x19.7”) ensures clean eyes, noses, and smiles.
- 3–5People: Opt for 60x80 cm (23.6”x31.5”) or larger to preserve individual features.
- Large Family Groups: Canvases starting at 80x80 cm (31.5”x31.5”) provide enough drill grid density to prevent faces from looking pixelated.
- Pro Tip: You can request a digital preview before having your custom canvas kit printed. This allows you to see in advance how your photo will be transformed into a colorful grid pattern.
5. Choose Between Round and Square Diamonds
Your choice of drill shape affects both the crafting experience and the final aesthetic.
- Round Drills:
Ease of Use: Beginner-friendly and allows for faster placement.
Canvas Fit: Leaves tiny spaces between drills.
Visual Look: Creates a shiny, soft cross-stitch appearance.
Best For: Casual crafters and soft, simple portraits.
- Square Drills:
Ease of Use: Requires more precise placement and alignment.
Canvas Fit: Fits edge-to-edge with no gaps, creating a "snap" feeling.
Visual Look: Creates a crisp, sharp mosaic effect.
Best For: High-detail custom family portrait diamond painting projects.
6. Tips for Creating a Family Photo Diamond Painting
- Use an LED Light Pad: Placing an illuminated light pad underneath your canvas reveals printed symbol codes clearly, especially on dark background sections.
- Work in Small Sections: Peel back only a small area of the protective canvas film at a time. This prevents dust from contaminating the sticky adhesive layer while you craft.
- Apply the Checkerboard Method: When placing square drills on facial features, place every other drill in a grid pattern and go back to fill in the gaps. This locks rows into straight lines.
- Seal Your Work: Apply a clear, gloss acrylic sealer over the completed canvas to secure every drill firmly before framing.
7. Common Mistakes to Avoid
- Choosing Low-Resolution Files: Low image resolution results in fuzzy facial features across the grid. Always upload high-quality source files directly from your camera roll.
- Selecting a Canvas That Is Too Small: Important facial details lose definition and turn into blocky, pixelated shapes on small canvases. If budget limits your canvas size, crop out non-essential background space.
- Using Backlit Photos: Standing directly in front of bright windows or sunsets casts faces into deep shadow, forcing the conversion software to generate unnatural, muddy skin tones.
- Overcrowded Group Shots: Too many subjects crowd out individual facial expressions. For large group photos, choose a close-up shot focused on faces rather than a full-body picture.
8. How to Display Your Finished Diamond Painting
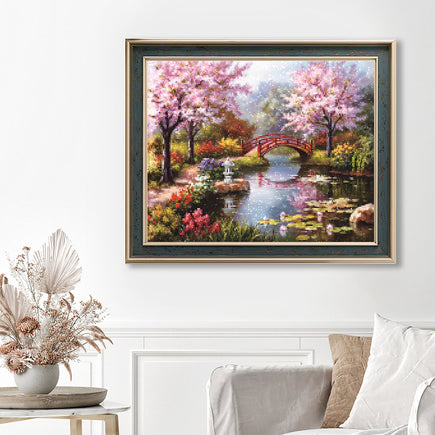
Once the final drill is set and sealed, mounting your custom canvas ensures it catches the light beautifully while protecting your artwork for years to come.
- Shadow Box Framing: Use a shadow box or framed display with matting spacers so the glass does not crush the raised facets of your resin drills.
- Stretched Canvas Mounting: Wrap the canvas border tightly around wooden stretcher bars for a modern, gallery-style display without a heavy outer frame.
- Magnetic Poster Hangers: Clamping wooden magnetic poster hangers along the top and bottom edges offers an effortless, minimalist presentation that takes minutes to set up.
- Strategic Lighting: Display your finished portrait near natural ambient light or beneath overhead spotlights—the faceted angles of the drills shimmer best when lit from above or the side.

9. Why a Custom Family Photo Diamond Art Makes a Meaningful Gift
Handcrafted art carries an emotional resonance that store-bought items simply cannot replicate. Spending hours placing thousands of sparkling drills onto a loved one's portrait transforms the crafting process into a meditative celebration of treasured memories.
A completed canvas serves as an extraordinary personalized family gift for major life milestones—including anniversaries, milestone birthdays, housewarmings, and holiday celebrations. Hanging on a wall, it stands as a sparkling tribute to the moments and people that matter most.
Start Transforming Your Family Memories Today
A family photo diamond painting is far more than a simple weekend craft project; it is a creative, hands-on way to preserve the moments and people that mean the most to you. With the right photo, a properly sized canvas, and a little patience, anyone can transform a favorite family memory into a shimmering, gallery-worthy piece of artwork.
Browse your favorite photo album, select a picture that tells your family's story, and begin creating your one-of-a-kind keepsake today!